Monday, October 31, 2016

Small EDF racer

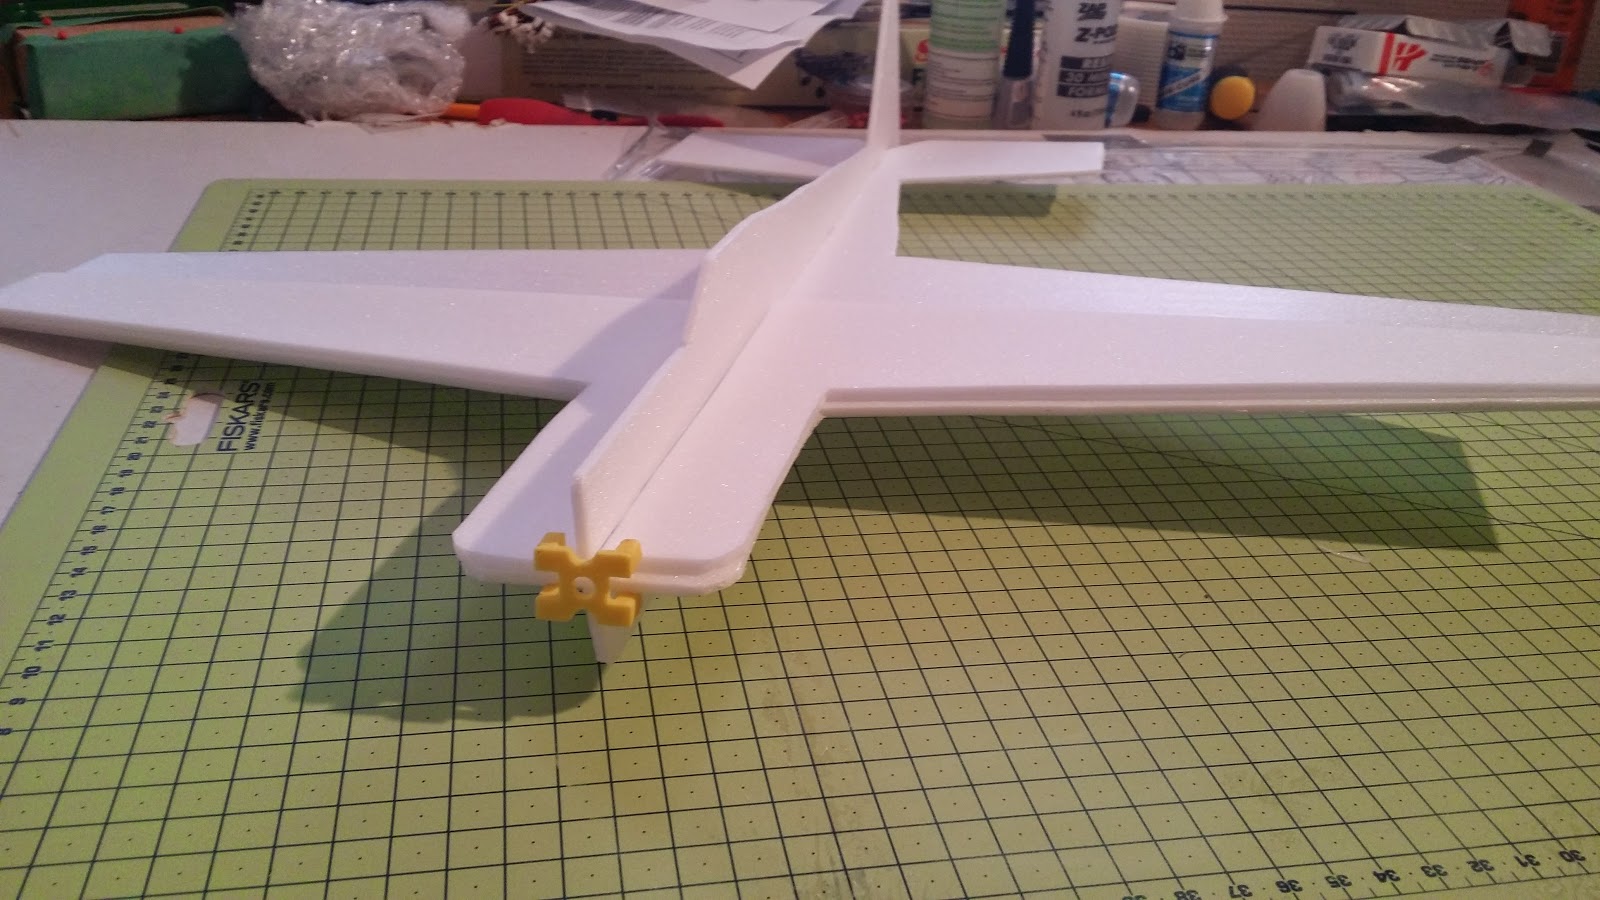
Every now and then, you just feel an unexplained need to drive something around your kitchen floor. When this feeling hits, it's nice to have enough depron and RC equipment ready to just whip something together on the fly.

One hung over Saturday, I felt the urge sneaking up on me, so I sat down with Fusion 360, and made the plans to make a small floor racer, using an EDF I got from ebay, and some other leftover parts.


Here are some pictures of the process:


Wednesday, July 6, 2016

Building an airbrush painting station

Last Christmas, I decided to design and construct a paint station for airbrushing, and overall painting of models and gaming miniatures.

The basic idea was a to make a 3-sided area with a lid, that had enough suction in it to clear out the airbrushing mist. The three side sections should have shelves suitable for storing paints and other materials, easily accessible while painting - and for transportation of the unit.

Finally, there should be sufficient lighting embedded in the lid for painting without an external light source.

As an additional challenge for myself, I decided to try and assemble the main parts without using screws or nails. Instead, it is using wooden pegs and glue.

As a bonus touch, I added a handle for carrying. the whole unit.

The final station, with paints and tools in place.
The build turned out to be quite a success. The suction from the two bathroom fans is enough to create a low pressure area inside the box, making the paint fumes flow out. I added two flexible tubes to the fans that lead the exhaust out the window, this is not shown by the pictures.

Also, the lighting from the 4 LED bulbs is perfect for painting. Even in an otherwise unlit room, it is pleasant to work within this space.

Thirdly, the unit is perfect if you have limited space, and can not always have your paints and tools out. Just fold the parts together, and store it under your bed - with paints and everything inside.

Lastly, here are some pictures from the build process:


Sunday, June 7, 2015

Cessna 182 landing gear finished

So I finally got around to finishing the printed landing gear for my Cessna. I originally wanted to print a mount for the support struts, but I decided against it, since I did not trust the connection by epoxy straight onto the side of the fuselage.

Instead, I went for a tested and tried combination of BBQ skewers and rubber bands, and the result feels way more solid than I'd hoped for. Take a look at the video to see the abuse it handles. I may need to add a second pair of rubber bands across to stiffen up the suspension, but all in all I am very satisfied with how the gear assembly performs!


Wednesday, May 13, 2015

Cessna landing gear

Just a quick update on the printed landing gear project. I finally got around to printing my gear design, and mounted it on the Cessna, which by now has been through more repairs than Michael Jacksons nose. Anyhow, the gear fits well, and seems to have an adequate amount of suspension. It is not too soft, as I feared. Tomorrow, or this weekend, I will test it out.


Monday, May 11, 2015

Custom plane design revision 1

After playing around with building the RCPowers foam jets for a while, I decided to make an attempt at creating my own plane. I started fiddling with some plans, and made the first iteration last Sunday. The specifications are loosely as follows:

wingspan: 50cm
length: 45 cm
engine: 10g outrunner
ESC: 6amp generic Ebay
battery: 450mah 2S lipo
servos: 4x3.7g 

Assembling the plans
Anyone who has built an RC foamie before should recognize the steps here. I printed the plans in poster mode, which means you have to manually tile them together. Not too much work.

All the parts cut out and ready for assembly
First test assembly (no glue)

With all the plans cut out from 3mm depron, I put them together without glue, to make sure everything fits well. At this stage, I realized that the plane might actually fly.

Gluing with epoxy, making sure things are relatively 

I glued all the foam parts in place using 30 minute epoxy. It's slower than hot glue, and I'm not sure the added strength gives much of an advantage considering the breaking properties of depron (hint: it breaks.  A lot.), but it should in theory save a few grams, and is a lot less messy.

3D printed control horns!

After gluing the parts, I finally mounted the power plant and the RC equipment. It really paid off having access to a 3d printer for the custom engine mount, but off-the-shelf stuff, or a plywood cutout should work just fine.

Mounting the engine

And finally, a video of the first prototype. 


I did not yet maiden this plane, since I'm waiting for a really calm day. It's very light and most likely handles wind as well as Titanic handled icebergs.

Thursday, April 16, 2015

Spitfire construction, part 1

I started building the spitfire kit this week. I acquired a plaster plate from the local hardware store, which made for a lot more stable building surface than my old scavenged cork board.

I am concerned about the reliability of the linear servos I got from ebay, but otherwise the build is going OK.


I printed a pair of servo holders, since there's an IC on the underbelly of the servos, making direct attachment to the balsa impossible.


Thursday, January 15, 2015

Hawker assembly

Just a quick update on the hawker, this is what it looks like after assembly. Still need to apply strips of tissue along the seems, and seal the pores of the tissue. After that, adding the rubber band and nose cowl will finish the build.


Wednesday, January 14, 2015

Tissue covering the pink Hawker

I started building the pink Hawker Hurricane, which is a Guillows 506 kit, a couple of years ago. However, I never got around to finishing it. Tonight I got a spur of motivation, and pulled out the tissue paper and white glue.


The process is quite straight forward, the trick is to not apply glue to too big of a portion at the time.


After covering, the tissue has to be shrunk. This is done by applying water, which seems brutal. The end result should be pretty decent, although I did notice some creases that most likely will not stretch out completely. Regardless, it is a pink plane built mainly as a test for the RC conversion spitfire, so I do not care all that much.


Tuesday, December 2, 2014

Getting the micro radio working

This evening was spent getting my radio setup working. This micro radio from hobbyking is very cheap, and seems to be working fine. However, the documentation is lacking, to say the least.

First of all, my servos and the radio has the power and signal leads completely backwards. This meant that I had to unhook the leads from the servo connectors, and insert them in reverse order. Not terribly difficult, it's just a matter of using some sharp tool to lift the small plastic hook holding the leads in place, while pulling the wires out. Then just push them back inside in the correct order.

The leads should pull out with no resistance after lifting the plastic hooks


The binding was confusing. You have to connect channel 1 and 5 using a wire that comes with the radio, and then bind using your favourite hitec A-HFSS compatible transmitter. I'm using an Aurora 9x.

Set the transmitter in bind mode for a Minima, and wait for the green led to flash rapidly on the receiver. This worked fine. However, connecting the power/ESC to channel 3 after binding did not. The LED started flashing green again (it's supposed to be constant red when getting a signal). After some trial and error, connecting the ESC/power to channel 2 seems to do the trick.

Here's a video of my setup in action:


I guess I am running out of excuses to postpone the actual buidling of the plane now...

Monday, December 1, 2014

Don't try this at home

Just a quick update. I finally got the last JST connectors for my 2s 450mah batteries, and I threw together a ragtag balance + charging cable. It will short and burn down my appartment, I am well aware. However, it also pumps current into my batteries, which is, as we all know, far more important. I repeat; Do not try this at home. Ever.


Sunday, November 16, 2014

Some soldering work

I finally got my bullet connectors last week, and today I finally got the motivation to solder them. Things are progressing quite slowly with the micro plane, and I am still missing at least one set of connectors for the battery, and possibly a new balancing port for the 2s lipos.

Anyhow, here's todays results. I really need to get a shrink tube set.


Gonna have to shrink tube these at work tomorrow!

Wednesday, October 29, 2014

Time to build!

After quite a long while of thinking about eventually doing a Guillows free flight-to-electric conversion, I finally got pretty much everything I need to do the build. I'm still missing some connectors, but they should arrive soon. Regardless, I now have the essentials to actually start the assembly!

Sweet tiny parts of joy!

Monday, September 29, 2014

Landing gear progress

Just a quick update on the printed suspension landing gear I'm working on. After getting a shipment of PLA plastic, I'm finally able to print some precision parts. The ABS warping prevented any real mechanical parts from being printed.

The principle is fairly simple; one piston using a ballpoint pen spring and rubber bands attached to a joint that is connected to the plane and the wheels.

This is one side of the assembly


I still need to improve some of the parts, for instance I have to add a rubber band crossing between the two legs to absorb some landing energy. Otherwise, I'm pretty satisfied with the design so far, and hopefully I will have time for a real flight test before the snow sets in.


Sunday, September 28, 2014

Sunday project: printing a house!

One of the things that were on my list of things to try with the 3D printer was something from Minecraft. Today I did the first attempt, and it was a great success.

I built this quickly just to have a test print

I used the Mineways export software to select my house from the Minecraft world. It has really good configuration for the exported model. I chose a block height of 2mm for this house, and exported to STL which I then sliced normally.


Selecting the box to print is quite simple using Mineways


The print itself took about an hour with ABS plastic, and it's surprisingly cool looking. I guess the only thing to do now is to build something cooler than a 5 minute house, and see how it turns out!

The finished result

Friday, September 26, 2014

Draft be gone!

After battling with ABS warping, I finally canned any dream of ever using my living room dining table again, and built a draft shield for the printrbot on it.


It's not the prettiest thing ever, but it gets the job done. Observe the printed filament hole in the cardboard. And with proper cleaning and hair spraying between prints, I finally seem to get bigger ABS prints that are not completely broken from warping. I'm still reluctant to call it without printing some more big parts, though.


On a side note, I ordered some glow in the dark PLA filament today, which should make for some interesting prints. I'm also still waiting for my supply of regular PLA to arrive. The small roll provided as a sample with the printer is running low, hence all the ABS whining. When I get the PLA I will probably play around with it for a while before touching ABS again.